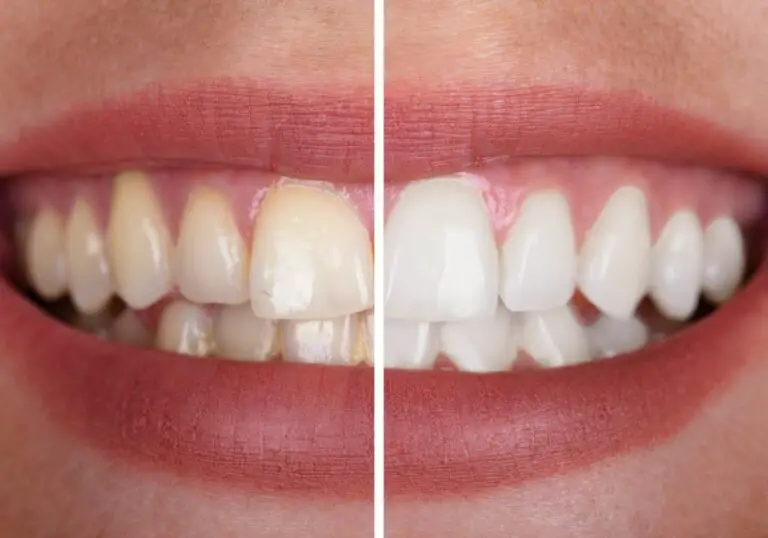
Are you tired of seeing yellow or stained teeth in your photos? Do you wish you could have a bright, white smile without spending money on expensive treatments? Luckily, there are several free online tools available that can help you whiten your teeth in photos.
With just a few clicks, you can enhance your smile and make your teeth look whiter and brighter. These tools are easy to use and allow you to adjust the size and intensity of the brush to achieve the desired effect. Whether you’re taking a selfie or posing for a professional headshot, teeth whitening tools can help you look your best in every photo.
In this article, we’ll explore some of the best free online teeth whitening tools available and show you how to use them to enhance your photos. We’ll also provide tips for achieving a natural-looking result and avoiding over-whitening. So, let’s get started and learn how to whiten your teeth in photos for free!
Understanding Teeth Whitening

What is Teeth Whitening
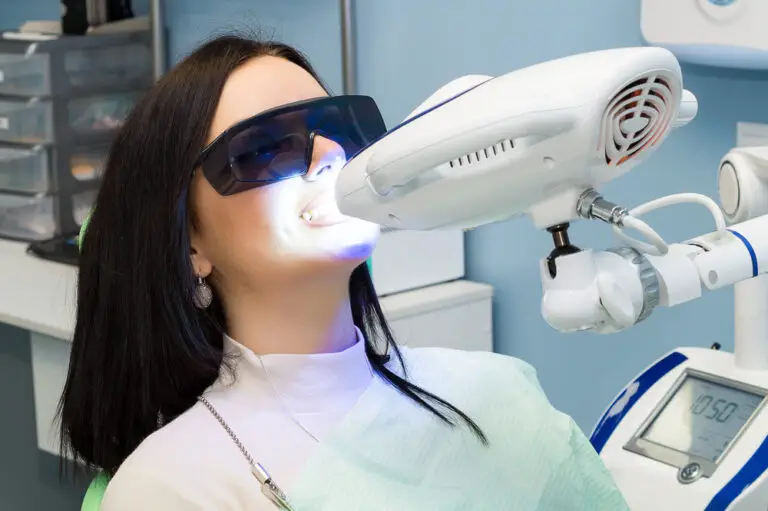
Teeth whitening is a cosmetic dental procedure that helps to remove stains and discoloration from teeth. The process involves using a bleaching agent to lighten the color of teeth, resulting in a brighter and whiter smile. Teeth whitening is a popular procedure that can be done in-office or at home using over-the-counter products.
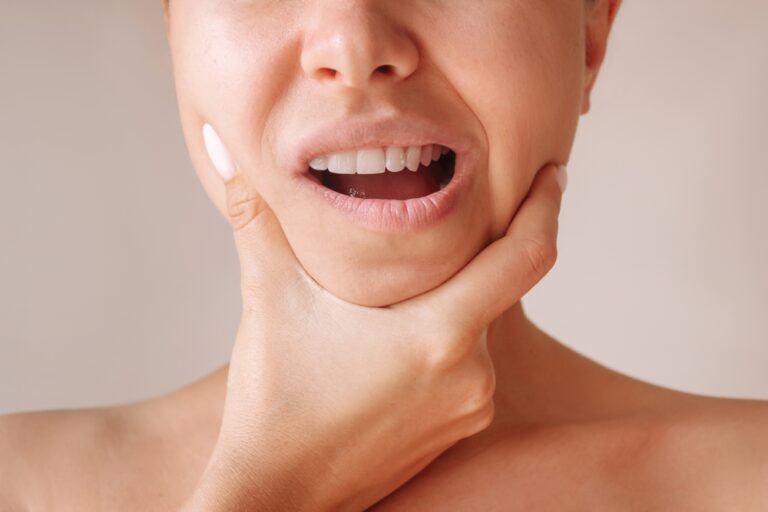
Why Whiten Teeth in Pictures
Having white teeth can make a big difference in how you look in pictures. It can boost your confidence and make you feel more comfortable in front of the camera. Whitening your teeth in pictures is an easy and affordable way to enhance your smile and make your photos look more professional.
Whether you’re taking a selfie, posing for a family photo, or getting professional headshots done, having white teeth can make a big difference in how you look. With the availability of online teeth whitening tools, you can now whiten your teeth in pictures for free without having to spend a lot of money on professional teeth whitening treatments.
Some of the reasons why you might want to whiten your teeth in pictures include:
- To enhance your smile and boost your confidence
- To make your photos look more professional
- To remove stains and discoloration from your teeth
- To make your teeth look brighter and whiter
Free Online Tools for Teeth Whitening
If you’re looking to whiten your teeth in pictures for free online, there are a variety of tools available to help you. Here are some options for you to consider:
Photo Editing Websites
- Fotor Photo Editor: Fotor offers a free teeth whitening tool that allows you to upload your image and clear away any stains from your teeth. You can change the brush size and intensity to get the desired effect.
- BeFunky: BeFunky’s teeth whitening tool is available under the Touch Up tab. You can adjust the brush size and make other adjustments to get the desired effect.
- PicMonkey Touch-Up: PicMonkey offers a Teeth Whiten tool that you can use to brighten your teeth. You can adjust the size of the tool to fit your chompers.
Mobile Apps
- CyberLink: CyberLink’s mobile app offers a toothbrush tool that you can use to whiten your teeth in photos. You can adjust the size and intensity of the brush to get the desired effect.
- Teeth Whitener: Teeth Whitener is a mobile app that allows you to whiten your teeth in photos. You can adjust the intensity of the brush to get the desired effect.
- Whiten Teeth Photo Editor: Whiten Teeth Photo Editor is a mobile app that offers a teeth whitening tool. You can adjust the brush size and intensity to get the desired effect.
Remember that while these tools can be helpful, they may not always produce the desired effect. It’s important to use them in moderation and not rely on them too heavily. Additionally, it’s always a good idea to consult with a dentist if you’re concerned about the color of your teeth.
Step by Step Guide to Whiten Teeth in Pictures

If you want to whiten your teeth in pictures for free online, there are several tools you can use. Here is a step-by-step guide to help you get started.
Choosing the Right Tool
First, you need to choose the right tool for your needs. There are several free online tools that you can use to whiten your teeth in pictures. Some popular options include CyberLink, PicsArt, and Fotor Photo.
Navigating the Tool
Once you have chosen a tool, you need to navigate to the teeth whitening feature. Depending on the tool you are using, this feature may be located in different places. Look for a “beautify” or “face tools” section.
Selecting Teeth Whitening Feature
Once you have located the teeth whitening feature, select it. This will bring up a set of options that you can use to adjust the whiteness of your teeth.
Applying the Whitening Effect
To apply the whitening effect, use the brush tool to paint over your teeth. Be careful not to whiten other areas of the picture by accident. Adjust the brush size and intensity as needed.
Saving and Exporting the Edited Picture
Once you are satisfied with the results, save and export the edited picture. You can then share it on social media or use it for other purposes.
Overall, whitening your teeth in pictures is a simple process that can be done for free online. Just follow these steps and you’ll have a brighter, more confident smile in no time!
Tips and Tricks for Natural Looking Results
When it comes to whitening your teeth, you want to achieve natural-looking results without causing any damage to your teeth. Here are some tips and tricks that can help you achieve the desired results:
1. Use Natural Methods
Using natural methods to whiten your teeth is the best way to achieve natural-looking results. Some natural methods include brushing your teeth with baking soda, oil pulling, and using hydrogen peroxide.
2. Be Consistent
Consistency is key when it comes to achieving natural-looking results. If you want to see a noticeable difference in the color of your teeth, you need to be consistent with your teeth-whitening routine. Try to whiten your teeth at least once a week to see a difference.
3. Don’t Overdo It
Whitening your teeth too often or using too much whitening product can cause damage to your teeth and gums. Follow the instructions on the product carefully and don’t overdo it. If you experience any pain or sensitivity, stop using the product immediately.
4. Maintain Good Oral Hygiene
Maintaining good oral hygiene is essential for achieving natural-looking results. Brush your teeth twice a day, floss regularly, and use mouthwash to keep your teeth and gums healthy. This will also help prevent future staining and discoloration.
5. Avoid Staining Foods and Drinks
Avoiding staining foods and drinks like coffee, tea, and red wine can help prevent future staining and discoloration. If you do consume these foods and drinks, rinse your mouth with water immediately afterward to minimize their effects.
By following these tips and tricks, you can achieve natural-looking results when whitening your teeth. Remember to be consistent, avoid overdoing it, maintain good oral hygiene, and use natural methods for the best results.
Safety and Ethics of Teeth Whitening in Pictures

When it comes to teeth whitening, safety and ethics are important considerations. While there are many products and methods available for whitening teeth in pictures, not all of them are safe or ethical. In this section, we will discuss some of the safety and ethical concerns associated with teeth whitening in pictures.
Safety Concerns
Teeth whitening products can be harmful if not used properly. Overuse of certain products can damage the enamel on your teeth, causing sensitivity and other problems. It is important to follow the instructions carefully when using any teeth whitening product, and to consult with a dentist if you have any concerns.
Additionally, some people may have allergies or sensitivities to certain teeth whitening products. It is important to test any product on a small area of skin before using it on your teeth, and to stop using it if you experience any adverse reactions.
Ethical Concerns
Teeth whitening in pictures can also raise ethical concerns. While it may seem harmless to whiten your teeth in a photo, it can create unrealistic beauty standards and contribute to a culture of body shaming. It is important to remember that everyone’s teeth are different, and there is no one “perfect” shade of white.
Furthermore, some teeth whitening products may contain harmful chemicals or be tested on animals. It is important to research any product before using it, and to choose products that are cruelty-free and environmentally friendly whenever possible.
In conclusion, while teeth whitening in pictures can be a fun and harmless way to enhance your smile, it is important to consider the safety and ethical implications of any product or method you choose to use. Always follow the instructions carefully, test products on a small area of skin first, and choose products that are safe, ethical, and environmentally friendly.
Frequently Asked Questions
What are some free online photo editors that can whiten teeth?
There are several free online photo editors that can help you whiten your teeth in pictures. Some popular options include Fotor Photo Editor, CyberLink, BeFunky, FixThePhoto.com, and PicMonkey Touch-Up. Each of these editors has a “teeth whitening” tool that you can use to brighten your smile in photos.
Which is the best teeth whitening app for editing photos?
The best teeth whitening app for editing photos will depend on your personal preferences and needs. Some popular options include Facetune, AirBrush, and YouCam Perfect. These apps offer a range of editing tools, including teeth whitening, and can help you achieve a brighter, more confident smile in your photos.
How can I remove lipstick from my teeth in a photo for free?
To remove lipstick from your teeth in a photo for free, you can use the “Clone Stamp” tool in Photoshop or a similar photo editing program. Simply select an area of clean teeth and use the tool to “clone” that area over the lipstick on your teeth. You can also try using a teeth whitening tool to brighten your teeth and make the lipstick less noticeable.
Is there an Instagram filter that can whiten teeth in pictures?
While there are many Instagram filters that can enhance your photos, there is no specific filter designed to whiten teeth. However, you can use Instagram’s editing tools to adjust the brightness, contrast, and saturation of your photos, which can help make your teeth appear whiter and brighter.
What are some tips for whitening teeth in Photoshop?
When whitening teeth in Photoshop, it’s important to use a light touch and avoid overdoing it. Start by selecting the teeth you want to whiten using the “Lasso” or “Magic Wand” tool. Then, use the “Hue/Saturation” tool to adjust the saturation of the yellow tones in the teeth. You can also use the “Dodge” tool to lighten specific areas of the teeth. Be sure to zoom in and work carefully to avoid creating an unnatural or “fake” look.
How can I change the color of my teeth in a picture online for free?
To change the color of your teeth in a picture online for free, you can use the “Hue/Saturation” tool in a photo editing program. Select the teeth you want to change using the “Lasso” or “Magic Wand” tool, and then adjust the hue and saturation until you achieve the desired color. Be sure to work carefully and use a light touch to avoid creating an unnatural or “fake” look.