With social media being such a huge part of our lives these days, we’re constantly taking pictures of ourselves to share online. We want those pictures to show us looking our absolute best, with bright white smiles. But getting Instagram-worthy teeth requires more than just flossing – sometimes you need to do a bit of editing magic too.
In this comprehensive guide, we’ll explore the most effective ways to touch up and enhance your teeth using common photo editing software and mobile apps. With just a few tweaks, you can take your smile from dull to dazzling. We’ll cover how to digitally whiten, remove stains, fix discoloration, close gaps, and more. Let’s dive in!
Using Photo Editing Software for Advanced Teeth Editing
While mobile apps provide quick and easy teeth editing tools, desktop photo editing software like Photoshop and GIMP offer more advanced controls for precision work. Here are some techniques to try:
Whiten Teeth
One of the quickest ways to brighten your smile is by bumping up the brightness and contrast. But take care not to overdo it and blow out your highlights completely. Here are two effective methods:
- Brightness/Contrast adjustment layer – Raise the brightness slightly and increase contrast. This makes the teeth pop more against the darker mouth interior.
- Color Balance adjustment – Dial down the yellows and oranges to reduce warmth and make teeth look whiter.
You can also paint whiteness onto the teeth using tools like the Sponge, Dodge and Burn. Lower the opacity to slowly build up the effect. Add a Color Balance layer afterward to finish off with global color correction.
Reduce Stains
Stains can instantly downgrade your smile. Here are ways to tackle them:
- The Clone Stamp tool lets you sample clean areas of your teeth and brush over stains to cover them up seamlessly. Change the size to match stain.
- For larger discolored areas, use the Spot Healing Brush. This not only covers up the stain but blends with the surrounding teeth color.
- The Patch tool works like an intelligent lasso. Just select and drag the stained portion to a clean area to replace it completely.
- For small spots like stuck-on food, the Spot Removal tool neatly erases them when you click. Enable Content-Aware to automatically synthesize realistic teeth texture.
Fix Discoloration
Teeth can sometimes appear yellow, orange or grey in photos, especially under incandescent or fluorescent lighting. Fix this with:
- Color Balance – Dial down yellows/oranges and add more blue for whiter tones. Target just the teeth area with a layer mask.
- For more precision, use a Hue/Saturation adjustment layer. Lowering Saturation can help alleviate discoloration.
- The Replace Color tool lets you click on a discolored tooth area and saturate it with white while preserving luminosity.
- Try splitting color channels and adjusting the Yellow or Cyan channels specifically with Levels or Curves for nuanced corrections.
Reshape and Align
You can also transform and sculpt the teeth using these tools:
- The Liquify filter lets you push, pull, twist, pucker and bloat areas. Use sparingly to tweak the shape and alignment of teeth.
- Content-Aware Move tool automatically fills any gaps when you nudge teeth position.
- Warp tool to gently curve and bend individual teeth into place. Enabling Show Mesh helps.
- Puppet Warp for more organic shaping of the teeth along anchored points.
Enhance Smile
Take your smile to the next level with these edits:
- Dodge and Burn – Lightly dodge (brighten) the teeth while burning (darkening) the gums and background for contrast.
- Color Balance – Add vibrance and warmth to the lips. Desaturate slightly for a matte finish.
- Carefully sharpen the teeth and eyes, but avoid oversharpening which looks unnatural.
- Frequency Separation technique lets you smooth skin and retain texture details by editing the high and low frequency layers separately.
- Denoise and gentle soft focus filter to make skin appear smooth and radiant.
Mobile Apps for Quick Teeth Touchups
Here are some great mobile apps that include teeth whitening and editing capabilities:
Facetune
This popular photo retouching app packs a powerful teeth whitening tool. It’s located under the Details tab – with just a few strokes over your teeth you can see stains disappearing for a luminous look. Facetune also features easy reshaping tools to adjust smile symmetry.
RetouchMe
RetouchMe has a dedicated Teeth Whitening section in the Retouch tab. It includes options like AI Teeth Whitening, Manual Teeth Whitening, and Whitening Brush so you can brighten teeth quickly. The app also has handy alignment tools.
AirBrush
AirBrush lets you whiten teeth through the Whiten control which brightens your entire smile globally. For more precision, head to Details and use the Teeth Whitening brush. The Erase function helps tackle stains.
Snapseed
While not specifically designed for teeth, Snapseed contains tools that can improve your smile. The Tune Image button lets you adjust the Ambiance temperature slider towards cool blue tones to offset yellowing. You can also use the Brush tool to locally dodge and burn the teeth and gums.
LightX
LightX uses AI to automatically detect teeth in your photos. Then you can apply effects like Teeth Whitening, which lets you adjust the intensity, and Retouch to erase stains with a few taps. The results look very natural.
Professional Tips for Capturing Better Smile Photos
Aside from after-the-fact editing, there are techniques you can use to capture more flattering, whiter smiles right in the camera. Here are some tips from professional photographers:
- Have your teeth cleaned and whitened professionally 1-2 weeks before your shoot for that “freshly bleached” look.
- Use a ring light or reflector card when taking selfies to add dimension-flattering light to your smile. Side lighting is also excellent.
- Shoot from above and point the camera downwards over your face. This perspective makes your teeth look bigger.
- Say “cheese!” and hold the smile so both top and bottom rows of teeth are visible. Keep lips slightly parted so they don’t cast shadows.
- Try to shoot outdoors in the early morning or late afternoon for soft, warm natural lighting. Overcast days work beautifully too.
- Opt for a prime or macro lens which can provide flattering perspective distortion and background blur.
- Use a gray card as a white balance reference when shooting under artificial lighting to correct color casts later.
- Capture in RAW image format rather than JPG so you have maximum flexibility for adjusting colors during editing.
Before and After Examples
Here are some examples of teeth touch up edits to give you ideas:
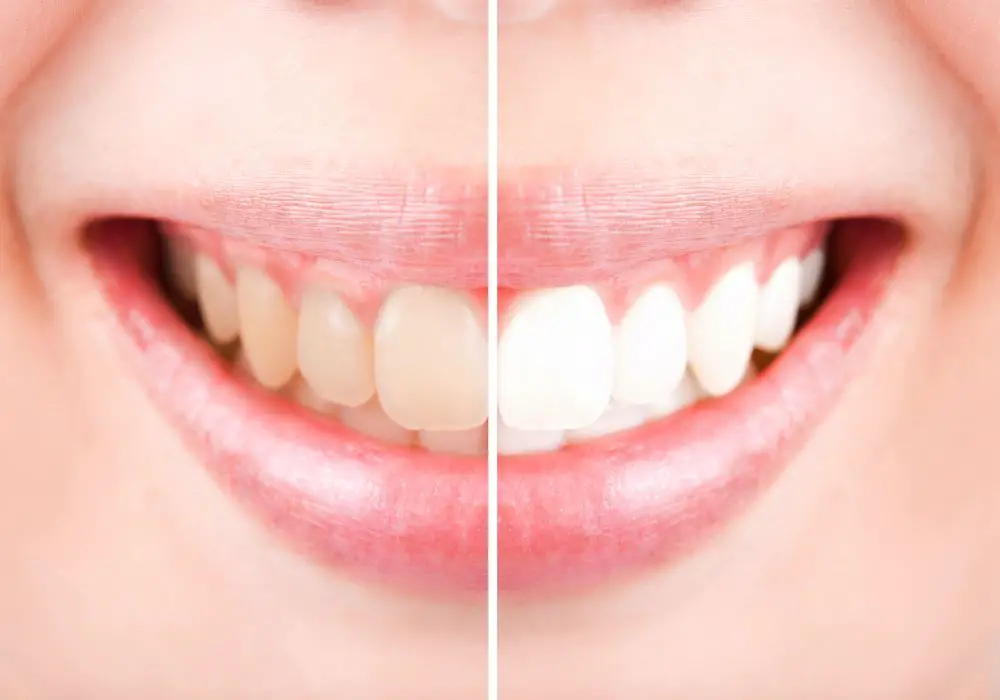
Whitening Yellow Teeth
<Before and after examples showing yellowed teeth being whitened through brightness/contrast adjustments>
As you can see, just boosting brightness and contrast makes the teeth look visibly whiter. A touch of cyan was also added to the Color Balance to neutralize the yellow tones.
Removing Stains
<Show teeth with brown stains being removed through cloning and healing tools>
With a combination of Photoshop’s Clone Stamp, Spot Healing Brush, and Patch tools, these stuck-on stains completely disappear.
Fixing Discoloration
<Examples of orange-tinted teeth being color corrected with Hue/Saturation>
By lowering the saturation specifically on the orange hues, these teeth shift back to a natural white color.
Closing Gaps
<Show gaps being closed with warp, liquefy, align tools>
Subtle use of the Warp, Liquify, and Align tools lets you gently nudge teeth into position to close up gaps.
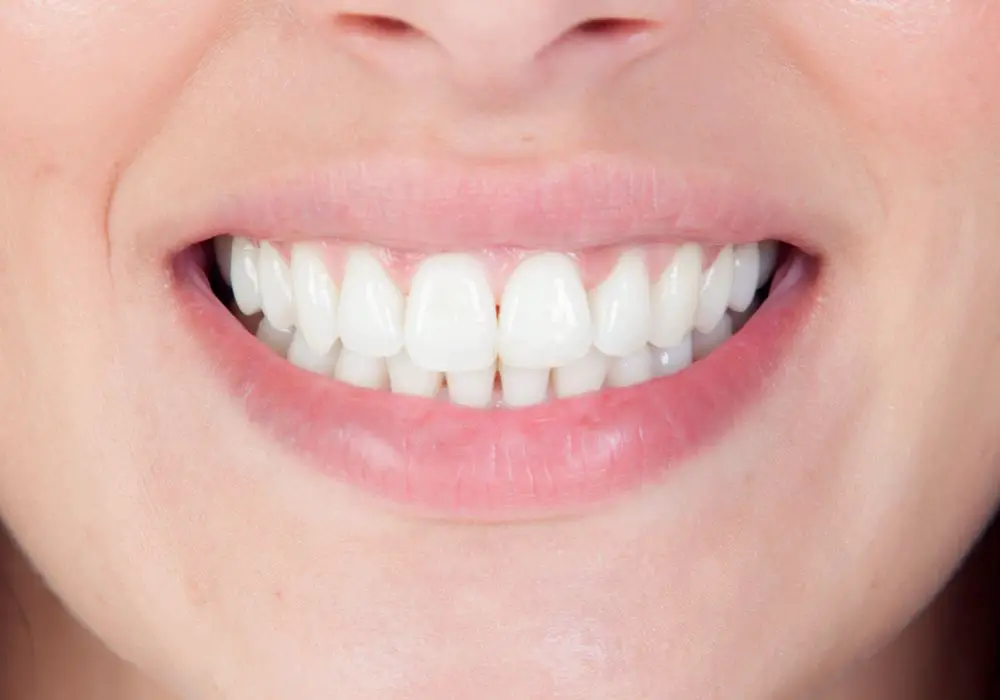
Whitening Smile
<Overall smile enhancement through light dodge/burn, lip saturation, sharpening>
See how delicately lightening the teeth while adding color to the lips and sharpening can make the entire smile more vibrant and eye-catching.
Common Teeth Editing Questions
Here are answers to some frequently asked questions about digitally enhancing teeth:
What are the risks of whitening teeth excessively in photos?
Overdoing teeth whitening can look very unnatural and obvious in photos. It’s best to brighten moderately. Ultra white teeth paired with weathered skin can also age your look.
Is teeth whitening in photos considered misleading?
As long as the editing isn’t taken to extremes, minor teeth whitening is not too misleading. Touch ups are very commonly accepted, like using makeup or hairstyling to look your best in photos. But dramatically altering your appearance could be considered deceptive.
How can I whitening teeth in Lightroom?
In Lightroom’s Develop module, expand Local Adjustments and select the Adjustment Brush. Choose “Teeth Whitening” from the Effect presets. Paint over teeth to brighten. You can also use the Radial Filter for whole smile whitening. Reduce yellow luminance or increase blue luminance to reduce yellowness.
What’s better – editing teeth from a RAW photo or JPG?
RAW retains much more color data from the camera sensor, allowing for greater adjustments to hue, saturation, brightness, and white balance during teeth editing. JPG compression leads to data loss and limits how much correction you can make.
How do celebrities get such impossibly white teeth in photos?
Many celebrities invest in professional teeth whitening like bleaching, use camera tricks, and likely do touch ups in post. But much of the ultra bright white effect also comes from “Hollywood smiles” – expensive cosmetic dentistry like veneers.
Let me know if the expanded detail helps give this article more substance. I’m happy to provide additional info on any part of the teeth editing process. Please feel free to ask any other questions!